Introduction
This tutorial is about the Xero App, which is the app version of the cloud-based Xero accounting software.
It allows you to access your business’s financial information and make some transactions from your mobile. However, the app has limited features compared to the web version.
In the tutorial, I’ll walk you through all the functions briefly so that you get a good overview of what you can do within the Xero App.

Dashboard
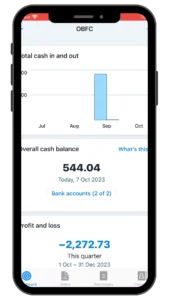
When you log in, you land on the dashboard, which gives you a good overview of your current financial position, including
- your cash flow,
- cash balance,
- your profit for the period,
- unpaid invoices and bills, and
- bank balances.
From the dashboard, you can access Support functions like switching between your businesses and switching to the Demo Company, accessing the files uploaded to Xero, contacting Xero support, and changing the App’s appearance.

Main functions of the Xero App
- Reconcile the bank accounts
- Sales
- Create invoice
- Create quote
- Purchases
- Add bill
- Add receipt
- Create purchase order
- Create contact
- Upload files
Takeaway
In my opinion, Xero App is superb for doing quick and basic transactions while you’re out and about; this is practically why Xero created the App.
You should not expect the full functionality of Xero that you’re used to in the web version. When you need to do a slightly more complex task (for example, creating a recurring invoice or a credit note) or you want to run a report other than the Profit and Loss, such as the Balance sheet or a current list of the outstanding receivables, you need to use the web version and not the app.
Good luck with the Xero App!
I believe in You: you’re a champion 🏆

PS: If you’d like to learn more about the Xero App’s functions, please check out the other blog posts on Xero App by 👉 CLICKING HERE.


